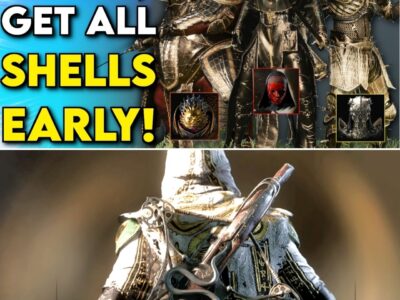
Perfect Mortal Shell II Start: How Players Are Unlocking Eredrim in Under an Hour
🚨 YOU CAN GET EREDRIM CRAZY EARLY IN MORTAL SHELL II — IF YOU KNOW THE ROUTE!
Most new players are still wandering through Fainweald, upgrading the wrong Shell and wondering why the early game feels brutal… meanwhile, experienced players are already rushing toward Eredrim, the Venerable — one of the strongest early options for surviving brutal encounters. 😳
But getting him in under an hour isn’t simply about running to his location… there’s a fortress, a dangerous encounter called The Warden, and one crucial route decision that can completely derail the rush if you don’t know what you’re doing.
🔥 Here’s the Eredrim early-game route — and the mistakes that can turn a sub-1-hour unlock into a disaster 👇

Perfect Mortal Shell II Start: How Players Are Unlocking Eredrim in Under an Hour
For new Mortal Shell II players, the opening hours can feel like a test of patience.
The game introduces a demanding combat system, multiple Shells, weapons, Tarstones and progression mechanics, but it does not necessarily force players to follow the order in which those systems become available.
That has created an increasingly popular strategy among experienced players: skip the conventional early-game routine and rush toward a stronger Shell as quickly as possible.
One of the most attractive targets is Eredrim, the Venerable.
Current guides consistently place Eredrim at the Citadel of Penance, where the Shell becomes available after the player deals with The Warden. PowerPyx lists Eredrim as the third Shell in its approximate normal progression and confirms that players can obtain him by reaching the Citadel of Penance, dealing with The Warden and interacting with Eredrim’s remains.
Other recently updated guides likewise describe Eredrim as a Shell that can be obtained during the opening portion of the game if players deliberately pursue him rather than simply following the most obvious progression route. One current guide specifically identifies Eredrim as a “boss-killer” Shell that can be grabbed early.
That has made the sub-one-hour Eredrim start an appealing challenge for players who have already spent dozens of hours learning the game’s systems.
But there is a catch.
Getting Eredrim quickly is not simply a matter of sprinting toward an icon on the map.
Why Eredrim Is Such an Attractive Early Target
Eredrim, the Venerable occupies a distinctive place in the Mortal Shell II roster.
He is built around a much heavier combat identity than early alternatives such as Tiel, the Acolyte or Proxima, the Broodseeker.
Current community tier lists generally place Eredrim around the A-tier range, specifically highlighting his ability to break enemy posture and his effectiveness against bosses.
That makes him particularly attractive to players who are struggling with the game’s early difficulty.
Instead of relying primarily on mobility or avoiding attacks, Eredrim allows players to lean harder into a heavier, more punishing combat style.
A current Eredrim guide describes his role as a tank with Break Damage, with his kit centered around mechanics including Shoulder Bash, Ethereal Diapason and Slaughterer stacks.
That combination is particularly interesting for players who want their first serious build to revolve around breaking enemy posture rather than simply maximizing raw attack speed.
And it explains why experienced players are willing to spend the opening portion of a run going out of their way to obtain him.
Where Eredrim Actually Is
The destination is Citadel of Penance, located in Fainweald.
The important sequence is:
Reach Citadel of Penance → enter the fortress → reach the central/lower section → trigger The Warden encounter → defeat The Warden → interact with Eredrim’s remains.
That basic sequence is consistent across the current guides.
PowerPyx’s route begins from the Citadel of Penance Beacon. From there, players head toward the center and descend to the lowest level. Two elevators provide access to the upper-middle section, where stepping onto the relevant platform triggers The Warden encounter. After defeating the boss, Eredrim’s body can be interacted with to unlock the Shell.
Destructoid describes the same basic structure: reach the Citadel, enter its courtyard, drop into the pit, reach the lower dungeon level, activate the lift near the blocked arena and eventually trigger The Warden ambush. Once the encounter is over, Eredrim’s corpse is available.
That last part is important.
Finding Eredrim’s body is not the beginning of the route.
The Warden is effectively the gatekeeper.
The Route Has a Potentially Confusing Middle Section
This is where players should be careful when comparing different YouTube guides.
Some current sources describe the Eredrim route using Gloomshade Grove and the Bloodcursed Lithopod, while others focus on the Citadel itself once the player has already reached it.
One recently updated Eredrim database places the beginning of the route around Gloomshade Grove and says the Bloodcursed Lithopod drops the Citadel Gate Lever, which is then used at the Citadel entrance.
Another route guide explicitly notes that the Citadel of Penance route has conflicting descriptions in earlier guides and recommends treating the Citadel/Warden sequence as the reliable core of the route.
For players attempting the sub-one-hour challenge, that distinction matters.
A speed-oriented route should not blindly follow every landmark from an old video.
If a guide was recorded from a different build or uses a different route through Fainweald, players may encounter doors, lifts or progression requirements in a different order.
The safest interpretation of the current evidence is:
Your target is the Citadel of Penance. The Warden is the critical encounter. Eredrim becomes available after that encounter.
The Warden Is the Real Test
The biggest misconception about an “under-one-hour Eredrim run” is that the challenge is mostly about movement.
It isn’t.
The route can be optimized.
The Warden still has to be beaten.
And if a player reaches the boss quickly but has not learned the combat system, the entire speed advantage can disappear.
PowerPyx specifically recommends a different approach to The Warden because many of its attacks are difficult or impossible to simply block through, making dodging and attacking from safer positions particularly important. The guide even recommends using Tiel and building around Shadow-related abilities as one strategy for the encounter.
That creates an interesting contradiction.
If your goal is to obtain Eredrim as quickly as possible, you may actually want to use another Shell to defeat the encounter that unlocks him.
You do not need to build your entire run around Eredrim before you have Eredrim.
The early Shell is a tool for reaching the next Shell.
Why Tiel Can Be Useful Before Eredrim
Tiel is one of the first permanent Shells available.
Current guides place him among the best early-game options, particularly because of his mobility and ability to use cloaking/shadow mechanics to avoid danger. GamesRadar currently considers Tiel one of the strongest Shell choices for standard gameplay, while Eredrim is highlighted as an excellent option for the mid-to-late game.
That creates a natural progression strategy:
Tiel first → rush Citadel of Penance → defeat The Warden → claim Eredrim.
It is not necessarily the only viable route.
But it illustrates an important principle for speed-focused players:
Don’t insist on using your destination Shell before you unlock it.
Use the Shell that makes the route easiest.
Then switch.
Don’t Waste the Early Game Farming Everything
A conventional first playthrough encourages exploration.
A speed-oriented Eredrim run does not.
If the objective is specifically to obtain Eredrim as early as possible, spending large amounts of time clearing every camp, collecting every resource and opening every optional area works against the goal.
This is especially relevant because Mortal Shell II has a large amount of buildcrafting available.
It is very easy to fall into the trap of thinking that you need a fully optimized character before attempting the Citadel.
You don’t.
The objective is not to create your final Eredrim build before obtaining Eredrim.
It is to reach the unlock point safely and efficiently.
That means prioritizing:
Movement through required areas
Necessary progression items
Beacons and route knowledge
Combat knowledge for The Warden
Enough resources to survive the route
Avoiding unnecessary fights
Everything else is secondary.
The Patch Changed One Important Part of the Strategy
Players following older Mortal Shell II videos should also know that the game’s economy has already changed.
Balance Patch 1 changed Shell map locations so that they now cost Gloom rather than Glimpses, while previously spent Glimpses are refunded. The developer said the change was intended to prevent players from having to choose between discovering a Shell and bonding with it.
That matters for Eredrim runners.
Older launch guides may tell players not to reveal Shell locations because of Glimpse costs.
That advice is no longer describing the current system accurately.
Players can still choose to navigate to Eredrim without purchasing a map reveal — PowerPyx explicitly notes that all Shells can be obtained without first paying to reveal their locations.
For a knowledgeable player, this can make the route even more efficient.
You already know the destination.
You don’t need to spend resources simply to make the map tell you what you already know.
What You Actually Gain From Eredrim
The appeal of this route is not merely the novelty of having another Shell.
Eredrim changes the way the game can be played.
His identity revolves around durability, heavy combat and Break Damage, making him particularly attractive for players who prefer forcing openings rather than constantly disengaging.
A current database describes his combat role as a heavy Shell centered on Break Damage and stagger-oriented play, while another current tier list specifically identifies him as the strongest Shell for breaking boss posture.
That can be extremely valuable during the first playthrough.
Instead of treating every enemy encounter as a prolonged test of reaction speed, players can build toward a style where creating a posture break becomes a central objective.
It also makes Eredrim particularly appealing for boss-focused builds.
But Is Eredrim Automatically the “Best” Shell?
No.
That is an important distinction.
Current tier lists do not agree that Eredrim is universally number one.
Games.gg currently ranks Genessa and Smert in S-tier, with Eredrim in A-tier.
Other guides rate Tiel and Eredrim as the best choices for standard gameplay. GamesRadar, for example, describes Tiel as the strongest early-mid-game option and Eredrim as the standout for mid-late-game play.
The disagreement is not necessarily a problem.
It illustrates that Mortal Shell II‘s Shell system is heavily dependent on playstyle.
A player who wants speed and mobility may prefer Tiel.
A player who wants boss stagger and heavier survivability may prefer Eredrim.
A player focused on a different damage interaction may eventually choose Genessa or Smert.
So the value of the one-hour Eredrim route is not that it gives everyone the objectively best character.
It gives players a powerful alternative very early.
The Real “Perfect Start”
For a fresh player, a highly efficient opening can therefore look something like this:
Complete the prologue.
Acquire an early permanent Shell such as Tiel.
Avoid unnecessary farming and exploration.
Navigate toward Citadel of Penance.
Activate the relevant Beacon and learn the central route.
Reach the Warden encounter.
Defeat The Warden.
Interact with Eredrim’s remains.
Return to Marrow Keep and begin developing Eredrim.
The exact time will vary.
A player familiar with the map and combat may approach the one-hour target.
A first-time player could take substantially longer.
There is no evidence that every normal playthrough should be expected to unlock Eredrim within exactly 60 minutes.
That distinction is important because the sub-one-hour claim is a player optimization target, not an official developer benchmark.
The underlying route, however, is very real.
What Should You Do After Unlocking Him?
The temptation is to immediately spend every resource available on Eredrim.
That may not be optimal.
First, determine what role you want him to play.
Current Eredrim build guides emphasize Break Damage, Shoulder Bash, Ethereal Diapason and Slaughterer interactions.
That suggests a build philosophy based around creating openings and punishing enemies when their posture is compromised.
It is very different from simply stacking generic attack power.
Players should therefore avoid copying a build blindly.
Test the Shell.
Understand how the abilities interact with your weapon.
Then decide which Tarstones and upgrades actually reinforce that combat loop.
The good news is that Mortal Shell II has already become more accommodating to experimentation.
Balance Patch 1 dramatically reduced the Gloom cost of weapon smelting, making it less punishing to change weapons and experiment with different setups.
So obtaining Eredrim early does not have to mean locking yourself into one permanent build.
The Bottom Line
The Eredrim, the Venerable rush is one of the more interesting ways to approach a fresh Mortal Shell II run.
The target is straightforward:
Reach Citadel of Penance.
Defeat The Warden.
Claim Eredrim.
Current guides agree on that core route, even though some differ on the exact landmarks and progression steps used to reach the Citadel.
For experienced players, getting Eredrim in under an hour is therefore a realistic optimization challenge.
For beginners, the more important lesson is not the stopwatch.
It is understanding that Mortal Shell II does not require you to follow the game’s most obvious progression order.
You can make an early Shell your temporary tool, bypass unnecessary fights, prioritize a specific destination and reshape your entire build once you arrive.
And that is ultimately what makes the Eredrim rush so interesting.
You are not simply unlocking another character.
You are changing the rules of your first playthrough before the game expects you to.