Mortal Shell II Best Shell Tier List: Which Shell Is Actually the Best?
🚨 THE MORTAL SHELL II META JUST GOT A LOT MORE BRUTAL!
One Shell can practically delete bosses, another can freeze time and turn entire encounters into target practice, while Eredrim can bully enemies through Break Damage — but the community absolutely does NOT agree on who deserves the #1 spot. 👀
And there’s an even bigger question: Is the Shell everyone calls “broken” actually better than Tiel, Genessa or Gragu once you enter NG+ and start pushing harder content?
🔥 Here’s the latest Mortal Shell II Shell Tier List — and why the rankings are causing so much debate 👇
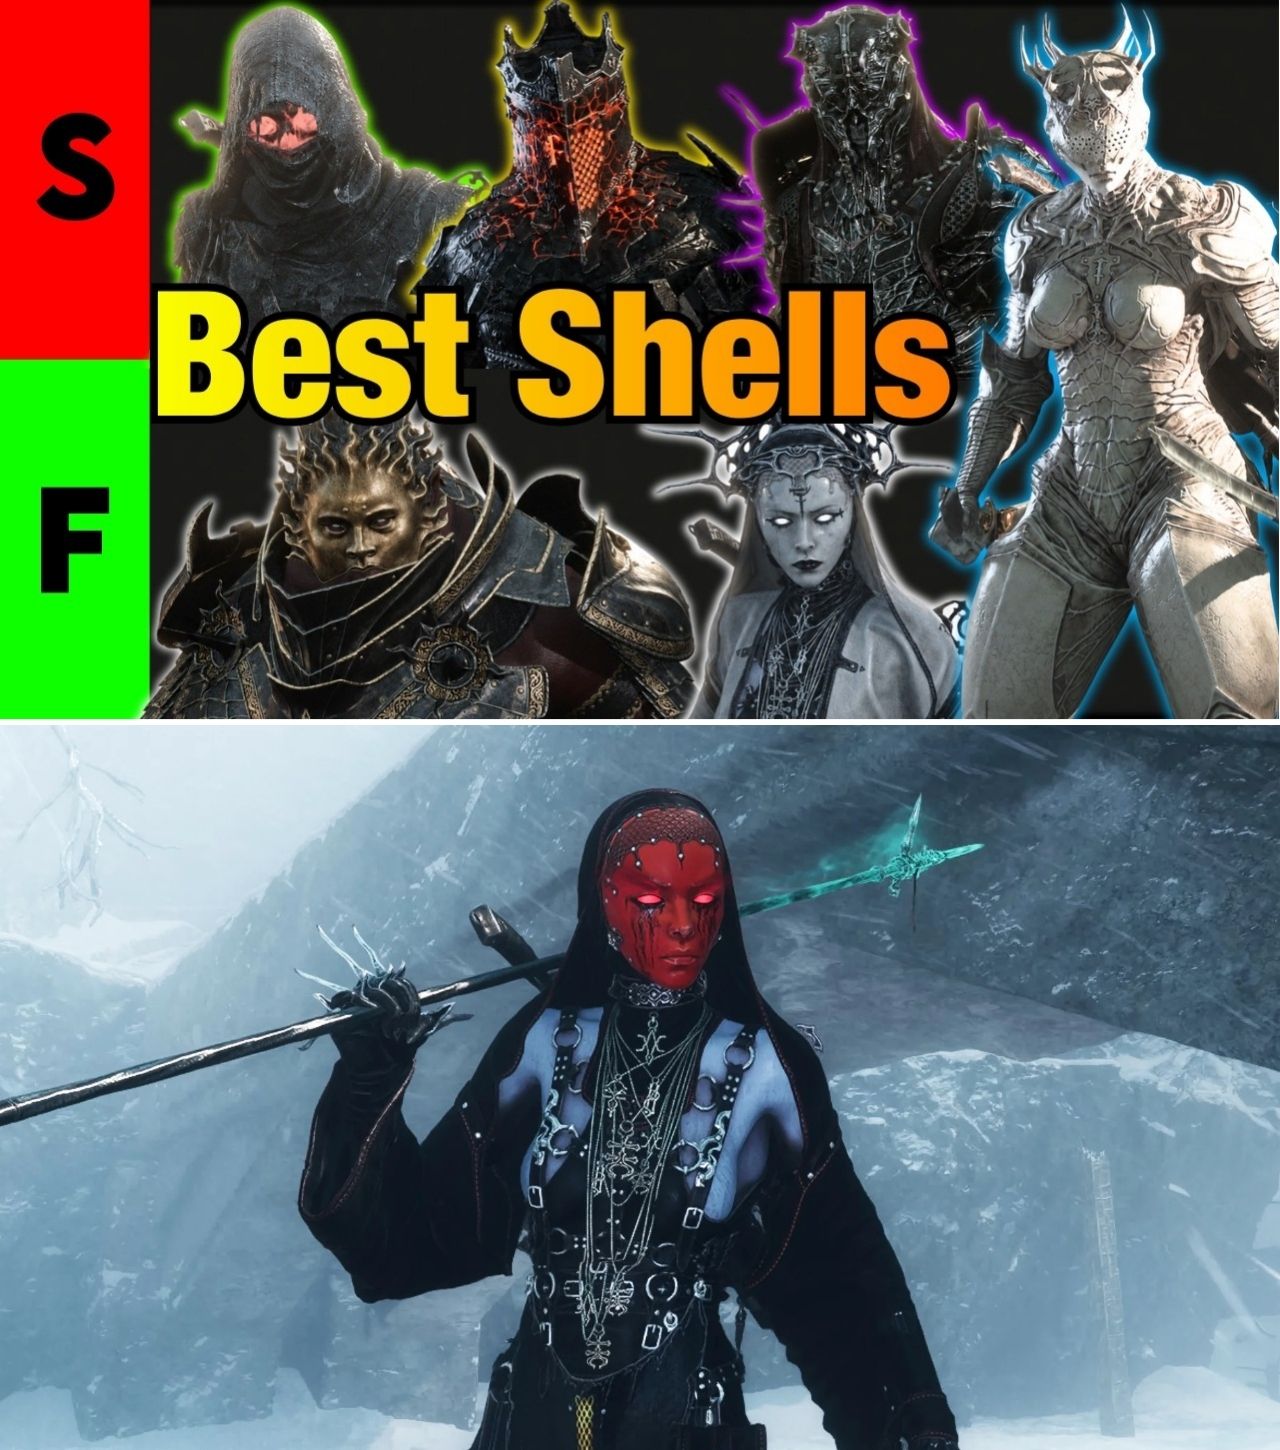
If there is one thing Mortal Shell II makes painfully clear, it is that your Shell can completely change the way you play the game.
Weapons matter.
Tarstones matter.
Skills matter.
But the Shell you choose determines the fundamental rules of your build — from health and survivability to unique abilities, Resolve interactions and the way you approach bosses.
And now that players have had enough time with the game to push deeper into NG+ and Night Mode, the early opinions about the roster are starting to evolve.
There is no official developer tier list from Cold Symmetry, so every ranking is ultimately an evaluation rather than an objective in-game ranking. But several current guides and community discussions are beginning to converge around a few clear favorites.
The biggest surprise?
The Shell that looks strongest on paper isn’t necessarily the one experienced players are calling their favorite.
And that is where the current Mortal Shell II meta gets interesting.
First: There Are 8 Permanent Shells
Before getting into rankings, there is one important clarification.
Mortal Shell II has eight permanent Shells:
Tiel, the Acolyte
Proxima, the Broodseeker
Eredrim, the Venerable
Gragu, the Insatiable
Smert, the Apostate
Lazlo, the Justiciar
Sariel, the Endless
Genessa, the Wayward
Harros, the Vassal, is excluded because he is only available during the prologue and cannot be retained as a permanent Shell.
That gives players eight radically different ways to approach the game.
But which ones deserve your precious Bond investment?
That’s where the arguments begin.
S-Tier: The Shells Currently Breaking the Meta
Several current tier lists place Genessa, Smert and Gragu at the very top.
Games.gg currently puts all three in S-tier, while another recently updated ranking reaches the same broad conclusion.
But the community isn’t unanimous about the order.
And there is a very good reason for that.
Each of these Shells breaks the game’s normal combat rules in a different way.
🥇 Smert — The Apostate
Best for: Boss control, burst damage and players who want to make enemies stop fighting
If the goal is simply “What Shell can make the game look the most unfair?”, Smert has an extremely strong argument.
His defining mechanic is Miracle.
The ability allows Smert to stop time, creating a window where enemies cannot respond normally while he builds his attack sequence.
Current tier-list analysis has placed Smert at the very top because his time-control mechanics can effectively deny enemies the opportunity to establish their normal offense.
And the community reaction has been even more extreme.
In a recent discussion from players testing Shells through NG+, players described Smert as capable of stopping time and producing extremely high burst damage, with some builds using his mechanics to overwhelm enemies before they can properly engage.
That is an enormous advantage.
Most Soulslike builds are about learning an enemy’s attack patterns.
Smert can instead ask:
What if the enemy simply doesn’t get a turn?
That’s a fundamentally different proposition.
The downside?
Smert’s playstyle can become repetitive.
If your entire strategy revolves around repeatedly manipulating Miracle and burst windows, you may find yourself skipping large portions of the combat systems that make Mortal Shell II interesting.
So Smert can be extremely powerful without necessarily being everyone’s favorite.
🥇 Genessa — The Wayward
Best for: Versatility, ranged builds and sustained damage
Genessa is another Shell that current tier lists consistently place near the top.
Games.gg currently calls Genessa the most flexible S-tier pick, largely because of her Faithful Doubles, which can attack enemies independently and allow Genessa to generate pressure without always standing directly in front of the target.
That is an enormous advantage.
Instead of trading attacks directly with a boss, Genessa can create additional sources of damage and manipulate the battlefield from a safer position.
And experienced players are noticing the same thing.
A recent Reddit discussion specifically praised Genessa’s clone damage, particularly when combined with ranged weapons and appropriate upgrades. One player described a double-clone setup combined with ranged attacks as capable of deleting enemies extremely quickly.
That gives Genessa something very valuable:
A high damage ceiling without requiring constant direct contact.
For players who enjoy summon-style builds, ranged combat or managing multiple sources of damage, Genessa is arguably one of the most attractive Shells in the entire game.
🥇 Gragu — The Insatiable
Best for: Sustain, critical hits and absolutely bullying bosses
Then there is Gragu.
And Gragu may be the most entertaining example of a Shell that looked unusual until players discovered just how far his mechanics could be pushed.
Current tier lists place Gragu in S-tier because of his combination of sustain and heavy stagger potential.
But community experimentation has revealed another reason players love him:
Critical-hit scaling.
A recent discussion from players comparing their favorite Shells highlighted Gragu’s extremely high critical-hit potential, including builds capable of reaching around 60% critical chance and producing enormous damage against enemies that have not yet been killed.
Another recent NG+ discussion went even further, with players describing Gragu as capable of one-shotting many enemies through his specialized mechanics.
That is why Gragu has developed a reputation as one of the game’s premier boss-cheese Shells.
He can sustain himself.
He can generate huge damage spikes.
And when the build comes together, ordinary enemies can stop feeling like threats altogether.
The catch?
His playstyle is more specialized than Genessa’s.
And some players simply won’t enjoy the rhythm.
A-Tier: Extremely Powerful, But More Specialized
The next group is arguably more controversial.
Depending on the tier list, Eredrim, Tiel, Proxima and Lazlo can all move up or down.
That’s because they solve different problems.
Eredrim — The Venerable
Best for: Boss Break, stagger control and survivability
After spending the last few articles looking at Eredrim builds, this ranking should come as no surprise.
Eredrim remains one of the most attractive Shells for players who want to control bosses through Break Damage.
Current tier lists generally put him in A-tier, with Games.gg specifically identifying him as a strong option for posture-breaking and boss control.
His defining tools include:
Shoulder Bash.
Ethereal Diapason.
Slaughterer.
And the various upgrades that allow him to convert successful Ripostes and Break opportunities into increased survivability.
This gives Eredrim a very different advantage from Smert.
Smert prevents the enemy from acting.
Eredrim makes it increasingly difficult for the enemy to stay standing.
And that distinction matters.
Recent community testing has shown Eredrim performing particularly well in NG+, with one experienced player describing a Frost Eredrim setup as exceptionally tanky while still capable of dealing strong damage.
Why isn’t he automatically S-tier?
Because Break control isn’t the same thing as raw DPS.
Some community players have complained that Eredrim’s Riposte damage can feel underwhelming, especially in harder content. That means Eredrim can sometimes control an encounter extremely well without necessarily killing the boss as quickly as another high-damage Shell.
For boss control?
Excellent.
For pure speed-killing?
Not necessarily #1.
Tiel — The Acolyte
Best for: High-skill players, mobility, stealth and enormous damage
Tiel is one of the most interesting Shells because he illustrates how dramatically player skill can change a tier list.
Several current guides place him in S or A-tier.
But experienced players are increasingly making an argument that Tiel may actually be the strongest Shell in the game if played correctly.
One recent Reddit player who had completed NG++ and tested seven of the eight Shells ranked Tiel #1.
The reason?
Damage.
The player specifically highlighted Tiel’s backstab damage, critical chance and critical damage, describing a build capable of rapidly regenerating Resolve while repeatedly returning to stealth.
That’s a very different kind of power.
Tiel doesn’t necessarily make mistakes safer.
He makes good play dramatically more rewarding.
If you can consistently dodge, reposition and attack from behind, Tiel’s damage ceiling becomes frightening.
But if you are constantly getting hit?
That same advantage can disappear very quickly.
So Tiel may be the ultimate example of a Shell where:
Tier-list ranking ≠ difficulty.
Proxima — The Broodseeker
Best for: Early-game flexibility, lightning and ranged control
Proxima is an interesting case because she is extremely accessible.
Current guides identify Proxima as one of the earliest permanent Shells available, and some tier lists specifically recommend her as the most practical first choice because of her early route and flexible toolkit.
Her identity revolves around grapple, lightning and control.
That makes her particularly useful for players who aren’t yet comfortable with Mortal Shell II’s close-range combat.
Instead of standing directly in the enemy’s face, Proxima can create distance, control groups and apply pressure through her ranged-oriented mechanics.
And community feedback remains positive.
One recent player specifically praised Proxima’s lightning abilities and described how the Axatana complements the Shell’s playstyle.
The downside?
Once players become extremely comfortable with the game’s systems, Proxima’s advantages may not scale as dramatically as Tiel’s damage ceiling or Smert’s time-control potential.
Still, for a first run, she is difficult to dismiss.
Lazlo — The Justiciar
Best for: Tanking, forgiving mistakes and Burn/AoE builds
Lazlo is the Shell you choose when your priority is simple:
“I don’t want to die.”
Current tier lists generally place him around A or B depending on their criteria.
His major advantage is survivability.
One current analysis describes Lazlo as having the highest HP and substantial damage reduction while his armor is active, with Retribution providing an AoE shockwave that also deals Break Damage and applies Burn.
His Heat system creates an interesting risk/reward loop.
Build Heat.
Enjoy the bonuses.
Then trigger Overheat when you want the larger offensive payoff.
The problem is that Overheat temporarily removes his protection.
That means Lazlo isn’t simply a walking fortress.
You still have to understand the timing.
For beginners, however, the extra survivability can be enormously valuable.
B-Tier: Specialized Rather Than Bad
The important thing about the lower tiers is that B-tier does not mean useless.
Mortal Shell II is built around radically different playstyles.
A Shell can be lower on a general-purpose ranking while being fantastic for one particular player.
Sariel — The Endless
Sariel is the most controversial Shell in current tier lists.
Some recent rankings place her in B-tier.
Others place her much lower.
One current ranking even puts Sariel alone in C-tier, primarily because her kit demands more specialized execution while offering less immediate value to the average player.
That doesn’t mean Sariel is broken or unusable.
It means the opportunity cost of investing heavily into her can be harder to justify when stronger general-purpose options exist.
For experienced players looking for a specific playstyle, however, that may not matter.
Tier lists are built around averages.
Players don’t play averages.
So Who Is Actually #1?
This is where the current community evidence becomes fascinating.
There are effectively three competing definitions of “best.”
Best for easiest wins:
Smert
His time-control mechanics can deny enemies opportunities to fight normally.
Best for maximum damage ceiling:
Genessa or Tiel
Genessa’s Faithful Doubles provide enormous sustained pressure, while experienced Tiel players report spectacular critical/backstab damage.
Best for boss control:
Eredrim or Gragu
Eredrim attacks the Break system directly, while Gragu combines sustain and massive damage spikes.
And that’s why a single universal tier list is increasingly difficult to defend.
The Community Doesn’t Agree — And That’s a Good Thing
Recent Reddit discussions show just how divided experienced players are.
One NG++ player ranked:
1. Tiel
2. Eredrim
and praised Tiel’s enormous damage while describing Eredrim as an extremely tanky, high-damage alternative.
Another discussion had players arguing for:
Eredrim, Gragu and Proxima
as their personal favorites.
Meanwhile, another player specifically recommended Smert, while others praised Proxima’s lightning kit and Gragu’s sustain.
This tells us something important.
There isn’t currently a universal community consensus that says:
“This is unquestionably the best Shell.”
Instead, there is growing agreement that several Shells can become ridiculous when their mechanics are properly exploited.
The Current Practical Tier List
If we combine the latest published rankings with the most recent community testing, a useful general-purpose ranking looks like this:
Tier
Shells
Best Use
S
Smert, Genessa, Gragu
Maximum control, damage and boss dominance
A+
Tiel, Eredrim
High DPS / Break & stagger
A
Proxima, Lazlo
Flexible early game / survivability
B
Sariel
Specialized playstyles
This isn’t an official ranking — and the order within each tier is absolutely debatable.
Current published lists vary considerably: Games.gg puts Genessa, Smert and Gragu in S-tier; another recent ranking puts Smert, Genessa and Gragu in S with Lazlo, Tiel, Proxima and Eredrim in A; while community testing has produced a strong argument for Tiel at #1.
That’s exactly why players should treat tier lists as build guidance rather than law.
Which Shell Should You Actually Choose?
For a brand-new player, the answer is surprisingly simple.
Want the easiest learning curve?
Proxima.
She is accessible early and provides a flexible toolkit.
Want huge damage?
Tiel.
Especially if you’re comfortable with dodging, positioning and back attacks.
Want to destroy boss posture?
Eredrim.
His Break-focused kit is built for exactly that.
Want to tank?
Lazlo.
His defensive identity gives you considerably more room for mistakes.
Want ridiculous burst?
Smert.
Time manipulation can completely change how encounters work.
Want sustain + boss bullying?
Gragu.
His healing and critical-hit mechanics make him one of the community’s favorite cheese options.
Want summons and ranged pressure?
Genessa.
Her Faithful Doubles create a completely different combat rhythm.
Want something more specialized?
Sariel.
She may not be the community’s safest investment, but that doesn’t mean experienced players can’t make her work.
The Real Meta Is Still Evolving
And this may be the most important part.
Mortal Shell II is still early in its lifecycle.
Players are only beginning to fully understand how Shell abilities interact with weapons, Tarstones, Resolve and higher-difficulty modifiers.
The current tier lists are therefore snapshots — not permanent laws.
The gap between “S-tier” and “A-tier” can also be misleading.
A highly skilled Tiel player may completely outperform a poorly played Smert.
An Eredrim specialist who understands Break thresholds may make a boss look trivial.
A Genessa player who understands positioning may never need to trade damage directly.
And a Gragu player who has optimized his critical-hit and sustain mechanics may simply refuse to let the game take control of the fight.
That is why the most interesting question isn’t:
“Which Shell is #1?”
It is:
“Which Shell makes YOUR preferred way of playing the game completely unfair?”
Right now, the answer could be Smert, Genessa, Gragu, Tiel or Eredrim — depending on what you value.
And judging by the latest NG+ discussions, the community hasn’t finished arguing about it yet.
The tier list is still moving.
And that might be the best sign that Mortal Shell II‘s Shell system is doing exactly what it was designed to do.