
Mortal Shell II’s Secret Mango Mask Is Hidden Behind a Fish, a Secret Chamber and One Very Weird Choice
🥭 MORTAL SHELL II HAS A SECRET MANGO MASK — AND THE WAY TO GET IT IS ABSOLUTELY INSANE!
There’s a hidden item called Mether’s Flesh, a strange Nightfish that literally swallows you, and a secret dungeon that eventually leads to a GIANT MANGO… but one wrong choice can cost you the Mango Mask for the entire playthrough. 😳
And this isn’t just a cosmetic Easter egg: the Mango can also restore 50% HP, while the hidden route unlocks the Ascension achievement/trophy — but you only get ONE Mango per playthrough. So… do you use it, or turn yourself into a walking mango?
🔥 Here’s the complete secret Mango Mask route in Mortal Shell II — before you accidentally miss it 👇
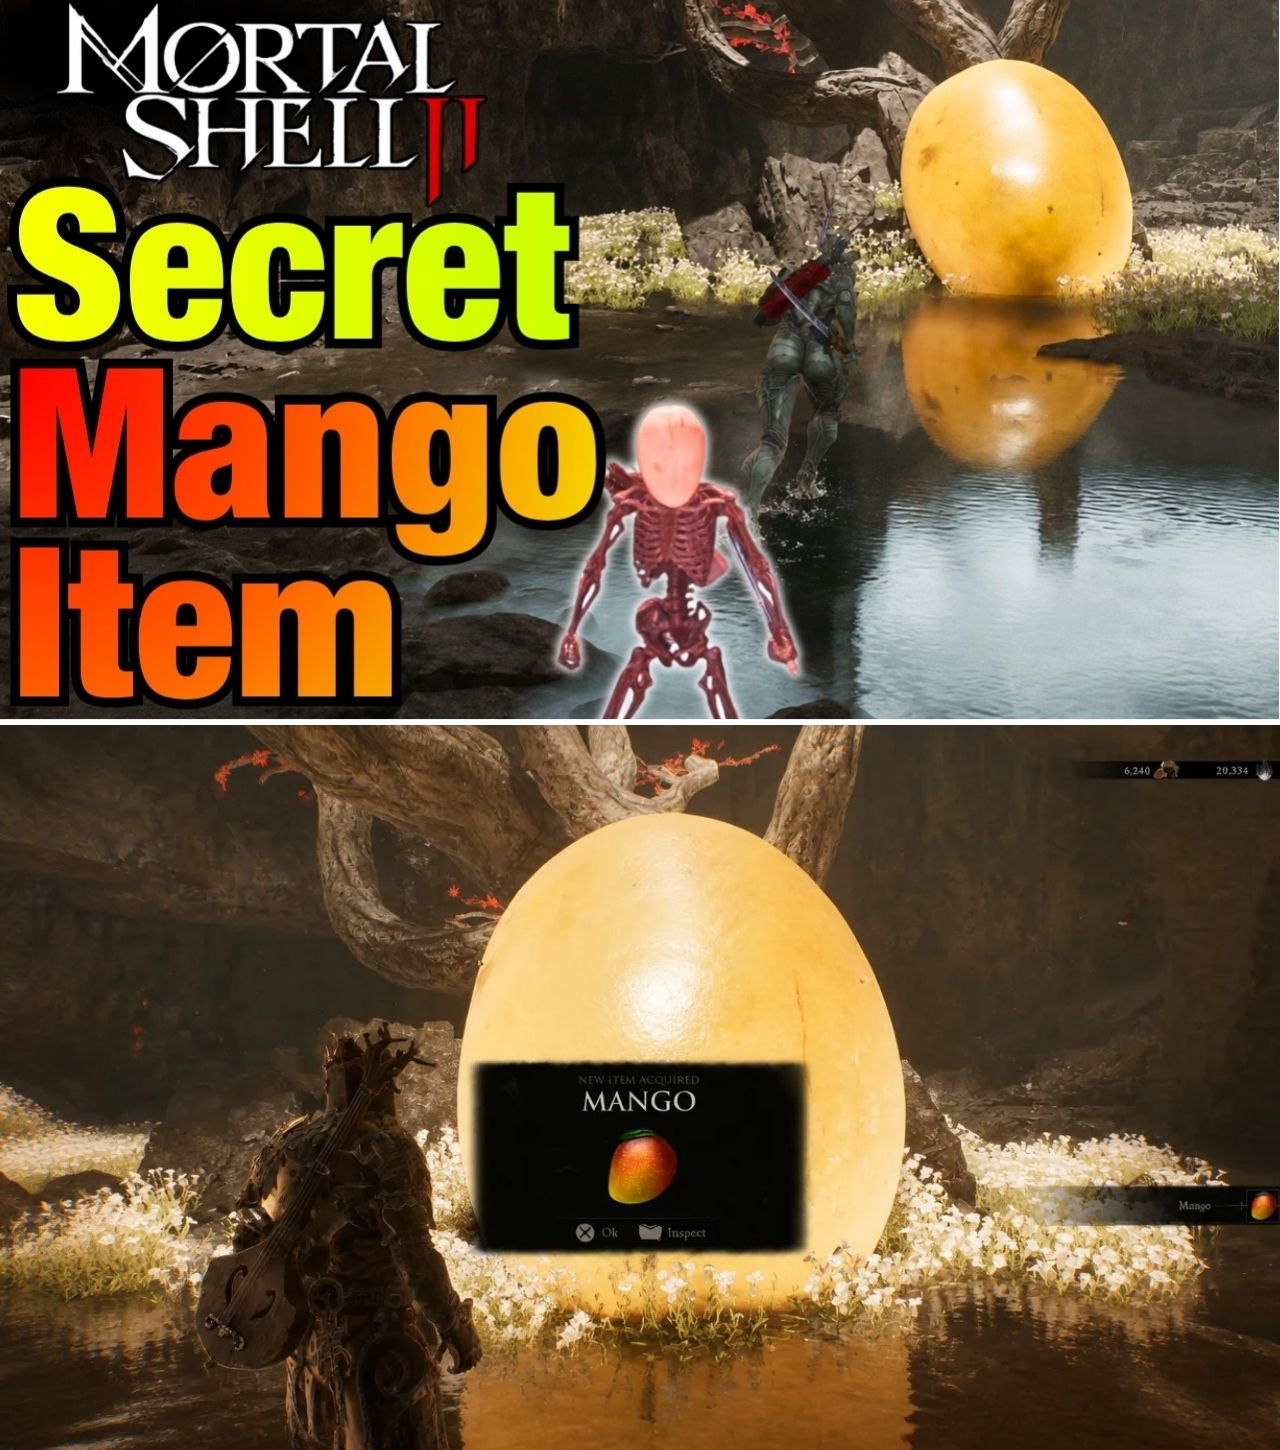
Mortal Shell II’s Secret Mango Mask Is Hidden Behind a Fish, a Secret Chamber and One Very Weird Choice
Mortal Shell II has plenty of secrets, but few are quite as strange as the game’s hidden Mango quest.
What initially looks like a completely unrelated exploration item eventually leads players through a secret chamber, a mysterious creature called the Nightfish, a hidden dungeon known as Mango Sanctuary, a giant piece of fruit — and one of the game’s hidden achievements.
The reward is the Mango, which has two potential uses.
As an active item, it provides a one-time 50% health restoration. Alternatively, it can be equipped passively to unlock the Mango Mask, a cosmetic that gives the Harbinger a distinctly… fruity appearance.
The catch?
There is only one Mango per playthrough.
And because the item can serve either a gameplay or cosmetic purpose, players have to make a meaningful choice once they obtain it.
That alone would make the Mango interesting.
But the route required to find it is what has turned this bizarre secret into one of Mortal Shell II’s most entertaining discoveries.
It Starts With an Item Called Mether’s Flesh
The first step isn’t finding the Mango.
It’s finding something called Mether’s Flesh.
The item is hidden inside the Pulsing Caves, located within the northernmost Corrupt Gate of Sanguine Caverns. Current guides consistently identify the Pulsing Caves Beacon as the starting point for the secret route.
And this is exactly the kind of location that is easy to run straight past.
From the Pulsing Caves Beacon, players need to head toward a crater-like area containing a hole in the ground.
Drop down.
But don’t simply continue through the obvious route.
The secret is nearby.
The Hidden Chamber Is Easy to Miss
After dropping into the lower section, players encounter a group of exploding enemies/statues near a torch.
This is the clue.
Behind them is a concealed section that can be opened by breaking the appropriate stalactite/hidden wall. Current walkthroughs describe destroying the obstruction to reveal the secret passage.
Inside the hidden area is a chest containing upgrade-related loot.
But the important item isn’t necessarily the chest.
It’s nearby.
Mether’s Flesh.
Pick it up.
At this point, the game doesn’t exactly explain what you’re supposed to do with it.
And that is where the secret becomes genuinely strange.
Mether’s Flesh Isn’t a Normal Consumable
The name alone sounds like something you probably shouldn’t be carrying around.
And the game’s presentation doesn’t immediately tell players:
“Take this to a fish and let it eat you.”
Yet that’s essentially the next step.
Current guides agree that Mether’s Flesh needs to be taken to a Nightfish located in a swamp cave near the Outskirts of Nochte.
So after collecting the item, fast travel toward the Outskirts of Nochte Beacon.
Then head into the swamp.
Look for the cave.
And inside is the creature you’re looking for.
Meet the Nightfish
This might be one of the strangest “quest objectives” in the game.
You don’t fight the Nightfish.
You don’t need to defeat it.
Instead, there’s an altar beside the creature.
Interact with it while carrying Mether’s Flesh.
The game presents the interaction.
Confirm it.
And then…
the Nightfish swallows you.
Rather than killing the player, the creature transports them into a completely hidden area: Mango Sanctuary.
It’s such an unusual transition that players encountering it for the first time could easily wonder whether they’ve just triggered some kind of secret boss encounter.
They haven’t.
They’ve found the entrance to the Mango.
Welcome to Mango Sanctuary
Once the Nightfish has done its job, you’re transported into the secret dungeon.
Fortunately, this part is much simpler than finding the entrance.
There is essentially one main route through Mango Sanctuary.
No huge maze.
No complicated branching path.
No major boss fight waiting at the end according to current guides.
Instead, follow the path forward.
And eventually you’ll see it.
A gigantic Mango.
Yes.
A giant Mango.
And this is where the entire strange chain finally makes sense.
The Giant Mango Is the Actual Reward
Interact with the Mango.
The game adds Mango to your inventory.
At the same moment, players pursuing completion will unlock the hidden Ascension achievement/trophy. Its description is deliberately vague, simply referring to discovering the “secret of the Mango.”
That makes the Mango route particularly important for completionists.
You aren’t just getting a joke item.
You’re also getting access to a hidden achievement.
And because the Mango only appears once per playthrough, missing the sequence can mean waiting until another cycle to obtain it again.
Then Comes the Weirdest Choice
You’ve finally obtained the Mango.
Now you have to decide what you actually want from it.
There are two functions currently documented.
Option One: Use It as an Active Item
The Mango can be used to restore approximately 50% of your health instantly.
That makes it surprisingly useful.
Mortal Shell II isn’t exactly a game where additional emergency healing is worthless.
A large instant heal can potentially save a run when your normal resources are depleted or a difficult encounter goes sideways.
But there is a price.
You won’t get the Mango Mask from that choice on the same run.
Option Two: Keep the Mango as a Passive Item
This is the choice for players who want the secret cosmetic.
Equip the Mango in the passive item slot.
That unlocks the Mango Mask through the Change Masks menu at a Beacon.
The result?
Your Harbinger gets a giant mango-shaped head.
And the joke goes even further.
Current guides report that when the Harbinger sits at one of the game’s sitting circles while wearing the Mango cosmetic, the character can transform into an even larger Mango-like form.
So this isn’t just a tiny cosmetic accessory.
The developers clearly committed to the bit.
Why the Choice Is More Important Than It Looks
At first glance, choosing between:
50% HP
and
funny Mango head
sounds like an obvious gameplay decision.
But there are several reasons players may choose the mask.
First, the Mango is an unusual cosmetic reward that cannot simply be purchased or unlocked through a standard progression menu.
Second, the Ascension achievement is tied to obtaining the Mango itself.
Third, the cosmetic can be changed at Beacons once unlocked.
And finally, Mortal Shell II is already developing a growing collection of unusual cosmetics and hidden secrets, making the Mango Mask particularly attractive to completionists and collectors.
The problem is that the Mango is effectively a one-shot decision for the current playthrough.
There’s an Important Achievement Warning
This is where players need to be especially careful.
If you’re hunting the Ascension trophy/achievement, make sure the Slayer Seal is NOT equipped when you collect the Mango.
Current guides explicitly warn that the Slayer Seal disables achievements while equipped.
This is particularly important because the Slayer Seal is also involved in other secret/farming routes.
A player who has been using it for an exploit may arrive at the Mango Sanctuary, interact with the giant fruit and wonder why the achievement didn’t appear.
The likely culprit isn’t the Mango.
It’s the Seal.
So before touching the giant fruit:
Check your equipment.
Unequip Slayer Seal.
Then collect the Mango.
Don’t Make the “Wrong Menu” Mistake
Another surprisingly common source of confusion is the cosmetic menu.
The Mango Mask isn’t necessarily going to appear in the same place as other cosmetic options.
Current guides identify Change Masks at Beacons as the menu where the Mango cosmetic becomes selectable after the Mango has been equipped passively.
So if you have:
collected the Mango,
equipped it passively,
and still can’t find your fruit head,
go to a Beacon and look specifically for:
Change Masks.
Also remember that masks are applied to the Harbinger, not while you’re inhabiting one of your Shells. Current cosmetic documentation notes that masks only visually appear when you’re outside your Shell.
That can make the unlock look broken when it isn’t.
The Full Secret Route
For players who want the entire sequence without getting lost, here’s the current route.
STEP 1
Travel to the Pulsing Caves Beacon.
This is inside the northernmost Corrupt Gate in Sanguine Caverns.
STEP 2
Find the hole/crater near the Beacon.
STEP 3
Drop down into the lower area.
STEP 4
Look for the exploding enemies/statues near the torch.
STEP 5
Break the hidden stalactite/wall behind them.
STEP 6
Enter the secret chamber.
STEP 7
Collect Mether’s Flesh.
STEP 8
Fast travel to Outskirts of Nochte.
STEP 9
Head into the swamp.
STEP 10
Find the cave containing the Nightfish.
STEP 11
Offer Mether’s Flesh to the Nightfish.
STEP 12
Allow it to transport you to Mango Sanctuary.
STEP 13
Follow the linear path.
STEP 14
Interact with the giant Mango.
STEP 15
Unlock Ascension.
STEP 16
Decide whether you want the Mango’s healing function or the Mango Mask.
That is the entire secret chain.
What Makes This Secret So Good?
The brilliance of the Mango secret is that none of its individual pieces immediately tells you what they’re connected to.
You find a strange item.
Mether’s Flesh.
You have no obvious reason to know where it belongs.
Then you find a weird fish.
Nightfish.
Instead of fighting it, you’re supposed to feed it the strange flesh.
Then the fish swallows you.
And instead of dying, you arrive in a completely hidden sanctuary.
And at the end?
A giant Mango.
It’s exactly the kind of discovery that encourages players to share screenshots, clips and guides because the solution is difficult to stumble upon through normal progression.
The route isn’t complicated once someone tells you the answer.
Finding the answer is the secret.
The Mango Is More Useful Than It Looks
It’s easy to dismiss the Mango as a joke item.
That would be a mistake.
The active version restores around 50% of your health, which makes it a legitimate emergency-healing option.
And current guides report that its healing value can increase in New Game Plus, reaching 75% according to available documentation.
That makes the item more than just a cosmetic Easter egg.
For players pushing difficult content, an emergency heal of that magnitude can be meaningful.
For collectors?
The mask is probably the bigger prize.
The Mask Is Purely Cosmetic
It’s also important not to overstate what the Mango Mask does.
Current cosmetic databases classify it as a mask, and its primary function is visual.
It doesn’t turn the Harbinger into a stronger combatant.
It doesn’t add some secret Mango attack.
It doesn’t increase your stats.
It simply makes your character look like a Mango.
And honestly, that’s probably the point.
Mortal Shell II has plenty of serious systems — Shell builds, Tarstones, weapons, abilities, Night Mode and difficult bosses.
The Mango is the developers reminding everyone that the game doesn’t have to take itself seriously all the time.
A Small but Important Contradiction in Current Guides
There is one detail worth flagging because the game’s documentation around the Mango has produced some inconsistent descriptions.
Several guides describe the Mango as:
Active = 50% heal
Passive = Mango Mask
Others have reversed the terminology in their written descriptions, despite the actual unlock instructions consistently pointing toward equipping Mango passively to unlock the mask.
So if you’re following a guide, prioritize the in-game slot behavior over a guide’s prose.
For the Mango Mask specifically, the currently consistent instruction is:
Equip Mango in the passive item slot → visit a Beacon → Change Masks → select Mango.
That is the safest way to interpret the current evidence.
Don’t Waste the Mango by Accident
This is probably the biggest practical warning.
You reach the secret sanctuary.
You see the giant Mango.
You interact with it.
The item enters your inventory.
At this point, don’t immediately use it if your goal is the Mango Mask.
Because the Mango is only available once per playthrough, consuming it for the heal means giving up the mask during that cycle.
Think carefully about what you actually want.
If you’re struggling with difficult combat:
The 50% emergency heal could be more valuable.
If you’re collecting secrets and cosmetics:
Keep it passive and unlock the Mango Mask.
If you’re chasing 100% achievements:
Make sure the Slayer Seal is unequipped before collecting it.
What Happens in NG+?
There is good news for players who miss the Mango.
Current guides report that the secret can be obtained again in New Game Plus, meaning the route isn’t permanently lost across the entire save if you miss it during the first cycle.
That doesn’t mean you should ignore it.
It simply means the mistake isn’t necessarily catastrophic.
You’ll have another opportunity during the next cycle.
And because your gear and progression carry into NG+, the return trip can be significantly less painful.
Why Players Are Talking About It
The Mango secret represents exactly the kind of hidden content that makes exploration in a Soulslike memorable.
There is no giant quest marker screaming:
“GO FIND THE MANGO.”
Instead, players have to connect:
Pulsing Caves
→ Mether’s Flesh
→ Nightfish
→ Mango Sanctuary
→ Giant Mango
→ Ascension
→ Mango Mask
It’s bizarre.
It’s hidden.
And once you know the answer, it’s surprisingly straightforward.
That combination is almost perfect for community discovery.
The Bottom Line
The Mango Mask is one of Mortal Shell II’s strangest hidden rewards — and getting it requires following one of the game’s most ridiculous secret chains.
Start at the Pulsing Caves.
Find the hidden chamber.
Collect Mether’s Flesh.
Take it to the Nightfish near Outskirts of Nochte.
Let the fish swallow you.
Enter Mango Sanctuary.
Follow the path.
Find the giant Mango.
Interact with it.
And then make your choice.
50% emergency heal — or Mango head?
For the cosmetic route, equip the Mango passively, then use Change Masks at a Beacon to select the Mango Mask.
And if you’re hunting the Ascension achievement, make absolutely sure Slayer Seal is unequipped before collecting the Mango.
Because Mortal Shell II apparently decided that one of its most elaborate secret quests should end with the Harbinger becoming a giant piece of fruit.
And somehow, that’s exactly the kind of secret players are going to remember.