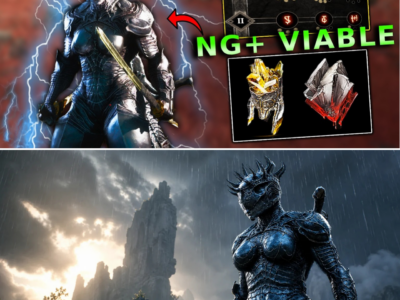
Breaking the Economy: The 4,000-Per-Second Gloom Exploit and Tarstone Farming Methods Shattering Mortal Shell 2
Want to break Mortal Shell 2’s leveling system and pull in 4,000 Gloom per second? 🤯💰
Speedrunners have just discovered a wild late-game glitch in the Brother’s Court where enemies literally load into the world and fall straight off the map, endlessly feeding you thousands of free Gloom without a single swing of your sword! Plus, community-tested methods for farming Tarstone XP in Night Mode are maxing out builds in minutes…
Want the exact steps to exploit the map glitch and max out your character before Cold Symmetry hotfixes it? 👇

Progression in any Soulslike game is traditionally a grueling marathon. Whether you are hunting for experience points, currency, or upgrade materials, the developers at Cold Symmetry designed Mortal Shell 2 to make every single point of Gloom feel hard-earned. Players are expected to slowly clear mob camps, conquer terrifying boss encounters, and carefully allocate their scarce resources to level up their Shells and weapon Tarstones.
Naturally, the gaming community took one look at that carefully balanced progression curve and immediately set it on fire.
As players dive deeper into the dark, labyrinthine corners of the Undermether, a series of astonishingly efficient farming spots—culminating in a jaw-dropping late-game map glitch that nets upwards of 3,600 to 4,000 Gloom per second—has completely rewritten the meta for character leveling.
Brought to light by gaming creator Jay Dunna, these methods range from legitimate, high-yield combat loops in Night Mode to downright bizarre technical glitches that leave enemies inadvertently plunging to their doom.
The Brother’s Court Glitch: Free Gloom from the Void
The crown jewel of the new farming meta is a bizarre, late-game glitch located in the Brother’s Court region. While it requires late-game progression to access, the payoff is so astronomically high that it makes every other leveling method look like pocket change.
The glitch exploits a loading error in the world geometry. By following a precise path from Marrow Keep—navigating through winding corridors, forcing specific enemy spawn triggers without engaging in combat, and utilizing spirit streams and bone teleporters—players can force a specific chunk of the map to de-render while keeping the enemy spawn tables active.
Once the glitch is properly initialized, players arrive at a specific beacon in the Brother’s Court. As the enemies attempt to load into the broken world, their spawn coordinates misalign, causing them to immediately fall straight through the floor and into the void of the map.
Because the enemies are technically “dying” as they fall, the game rewards the player with their full Gloom bounty—averaging around 3,600 Gloom every single time the beacon is rested at and refreshed.
“You’re getting massive Gloom—3,600 to be exact—in seconds,” Jay Dunna explained in his guide. “This is a pretty cool glitch… enemies just fall completely off the map, and you can do this as fast as you possibly can.”
While this method is unmatched for pure Gloom generation and maxing out Shell skill points, it comes with one notable catch: because the enemies are dying to environmental void-falls rather than combat interactions, it does not reward Tarstone Experience. For that, players must return to traditional bloodshed.
The Hidden Nave and Futilium Loop
For players looking for alternative late-game rewards—specifically Futilium and massive stock-piles of raw Gloom—the Hidden Nave presents another lucrative, albeit intended, farming loop.
Located near the final boss encounters of the game, the Hidden Nave requires players to grab a torch from a flame source, navigate a foggy corridor, and enter a treasure chamber overflowing with Futilium and Gloom chests.
However, the game attempts to gate this wealth by triggering a trap that forces players to surrender their gathered currency upon leaving the area. Resourceful players quickly found a workaround: by aggressively looting the room and then manually opening the game menu to reload an alternate save or exit to the main title screen, the game saves the items into the inventory while resetting the player to the outside beacon.
By repeatedly warping back to Marrow Keep to empty their pockets and returning to the Hidden Nave, players can generate infinite crafting currency with zero risk.
Gloomshade Grove: The Early-to-Mid Game Tarstone Grind
While late-game glitches and menu-reloads are great for raw currency, players still need to level up their Tarstones to unlock powerful weapon infusions like the Voltaic Crown. For Tarstone XP, early and mid-game players are turning back to a classic location: Gloomshade Grove.
Located early in the open world, Gloomshade Grove is packed with aggressive Gisha hunters. By activating Night Mode (placing the Gloombound Flame at Marrow Keep to summon Thestus and plunge the world into darkness), players supercharge the difficulty, which in turn drastically increases the experience yield.
Players use high-mobility Shells like Proxima or AoE abilities to group up the hunters, clear them out in seconds, and instantly reset the nearby beacon to respawn the pack.
“In Night Mode, they end up having a bit more scaling, which makes things challenging, but this is a solid one,” noted Dunna. A single clear yields over 11,000 Tarstone XP, granting roughly 200 XP per enemy pop when scaling modifiers are active. It is the premier location to level up stones like the Duality Stone without venturing into hyper-lethal territory.
Faithful Shelter: The Ultimate Combat Loop
For players who want a balanced mix of Tarstone XP, raw Gloom, and engaging combat without relying on map glitches, the Faithful Shelter (located in the Unfound Path near Brother’s Court) is the ultimate destination.
This zone features dense packs of high-yield enemies, including a troublesome bug-like creature and heavily armored Templar knights. A standard 10-minute clearing loop in this area yields staggering character progression. In testing, creators reported jumping a staggering 13 character levels in a single session—taking a character safely past level 50.
“You can just go ahead taking all these out, and you’re going to get a ton of Tar XP and a ton of Gloom,” Dunna stated. “It’s a quick and easy way to max out all your shells.”
The Developer’s Dilemma
The discovery of the Brother’s Court void-fall glitch and the Hidden Nave menu-reload loop highlights a persistent challenge for development studios designing vast, interconnected open worlds. No matter how thoroughly a game is QA-tested prior to launch, players armed with online communication will always find the path of least resistance.
Whether Cold Symmetry views the Brother’s Court map de-rendering as a critical priority for their upcoming patches remains to be seen. But until a hotfix rolls out to patch the void, players struggling against the punishing difficulty spikes of Mortal Shell 2‘s late-game bosses have a golden parachute. If you need 4,000 Gloom a second and don’t mind a little bit of spatial geometry breaking, the void is waiting.